January 17, 2011

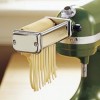
One kitchen tool I use all the time is the pasta attachment for my Kitchenaid Stand Mixer. Do you have one? It makes preparing fresh pasta an absolute snap! I can literally make homemade pasta in 10 minutes, cook it in 3 minutes, and we are eating before the girls are done with their homework.
I could not talk about this recipe without mentioning the two people who inspired it, and who I truly admire in the cooking world: Benedetta Vitali and David Tanis. Benedetta Vitali because she taught me how to make simple, delicious pasta right here in my kitchen, and David Tanis, who through his fantastic cookbook, Platter of Figs and Other Recipes, gave me the idea to incorporate fresh greens into my pasta.
Traditionally, making green pasta is an arduous process. You have to cook the greens within an inch of their life, drain them, mix them in, etc. etc. etc. etc. I don’t know about you, but I don’t usually have 5 hours to kill for pasta, especially when all the steps just are not necessary (sincere apologies to Marcella Hazan).
This is a great 2011 version of green pasta that is quick to make and doesn’t require boiling every single possible nutrient out of your veggies. It’s also a fun way to sneak wholesome greens to your kids without them realizing, and the color is spectacular on the plate. Believe me, this pasta is totally worth the effort. Once you make it, you and your family will be hooked!
Recommended Tools
Kitchenaid Stand Mixer
Pasta Attachment
Food Processor
Ingredients
3 ounces Swiss chard (woody stems removed)
4 egg yolks plus 1-2 egg whites reserved.
1 tsp. salt
1 cup Semolina flour
1 cup 00 flour (all purpose is fine if you can’t find the 00)
1 tsp. olive oil
Substitutions: If I’m out of chard, I grab whatever I have growing in the garden. The last time I made it, I used a mix of chard and arugula.
Directions
In your food processor or blender, mix the Swiss chard and the egg yolk until pureed completely – taking care not to leave any big chunks of greens.
In the bowl of your Kitchenaid mixer (isn’t the copper beautiful?), add the flour, salt and olive oil and give it a few turns with the pastry paddle attachment. Add the chard and egg yolk puree and mix.
If the dough seems really dry, add one of the reserved egg whites and mix to incorporate. It should still be somewhat mealy, but if you squeeze it in your hand, it should form easily into a ball.
Pick up the dough and knead it with your hands until it forms into a ball. Stick the ball of dough into a large plastic bag (I always keep a few in the box with my pasta maker) and let it rest a bit. While the dough is resting, I like to start my sauce and get the water boiling.
Let the dough rest for about 5 minutes, and then roll it out using your pasta attachment like you would for any other pasta.
To Serve
You can make the pasta in any shape, and it works great for ravioli. I used this exact recipe for a photo shoot for Santa Barbara Magazine. For the shoot, I cut the dough into 4×8 strips, filled it with a wild mushroom mixture, and baked the stuffed pasta in a wood-burning oven. You can read the article here.
This makes an easy appetizer for entertaining. Simply toss it with butter and Parmesan, and your guests will be so impressed! It is also a crowd pleaser when you are cooking dinner for another family. Recently, I served it with Joanna’s Salmon, which turned out great.
To prepare it in advance, toss the cut pieces in semolina and let them dry on a cookie sheet lined with parchment paper. This prevents the pieces from sticking together.