December 8, 2009


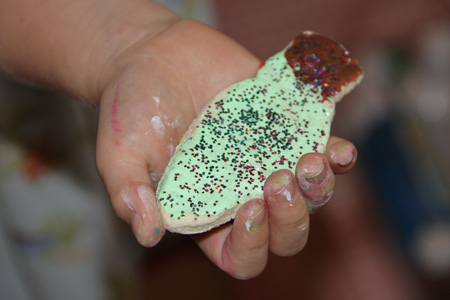
Everyone has special traditions that mean “Christmas” to them. One I remember fondly from my childhood was the annual event of my mom, my sisters and me, making Christmas ornaments from dough. I have been waiting for my girls to be old enough to bring back this tradition. It is a sentimental ritual and also a great way to go through the fun process of making dough and decorating them with the kids – without having sugar cookies lying around the house.
I love decorating the Christmas tree every year and seeing all the ornaments from years past, including a dough ornament that I made when I was five. I have a mix of beautiful bulbs and home made ornaments crafted by the girls. It is much more charming and a wonderful embodiment of the Christmas spirit to have a meaningful, personal collection up for our tree, rather than aspire to the “perfectly decorated tree.” In my opinion, beauty and memories, combined with an abundance of well placed white lights, make for the prettiest trees around.
I found this easy recipe at creativekidsathome.com. It’s totally forgiving and we added a bit of peppermint extract to make it smell more like Christmas. We sculpted the dough into ornaments and also used cookie cutter for tricky shapes. The girls used alphabet cookie cutters to make the first letter of their name.
Don’t forget to use a tooth pick to make a hole at the top of your ornament prior to baking, so you can hang your ornament on the tree. I always keep a stash of pretty ribbon from presents in years past to recycle into projects just like this. It’s great for the kid’s dexterity to thread the hole and practice their bows on these ornaments.
Preheat oven to 250 degrees
2 cups flour
1 cup salt
2 tsp vegetable oil
Water
Paint
Mix together 2 cups of flour, 1 cup of salt, and 2 tbsp vegetable oil. Slowly add 3/4 to 1 cup of water and stir until you get a nice clay consistency.
Once completely mixed, make into the desired shapes for different Christmas themes. You can mold shapes, or roll the dough out and use cookie cutters to shape. Be careful to not make the ornaments too thick or they will crack with baking.
Bake in oven for approximately 1 hour. The time will vary depending on how thick your creations are…when cooked fully they should not be hard, but also not doughy looking. Remember to always be careful when you have the kids in the kitchen with you, sometimes they get so excited that they forget about things like hot ovens!
Cool and paint your finished ornaments –we use regular poster paint.